I've been busy working but still managed to find time for a few fun projects. We'll start with the most recent.
Project One:
Halloween, I'm crazy for it. This years costume was Sherlock Holmes. Which of course is next to impossible to find in stores - especially when you are a female. So I decided to embrace my creative side and make my own. I started out drawing a template out of newspaper and in the end I'm thrilled with the results!
Here's the process in photos: [I'm missing a few but I'll explain them!]

Step One: Taping the newspapers together into a much larger sheet - I used about 6 sheets that overlapped. Make sure the overlaps are taped down good or it will cause a headache later. You most definitely need to be gentle with the newspaper - it tears easily but it will serve it's purpose.

Step Two: Using a bit of string, measure yourself - I started at the base of my neck and went to just past my wrist [remember some of the length will be lost when you sew]. Then take the measured bit and find the center of the newspaper. [You may need an assistant for this portion] Hold the string in place and create a circle from the opposite end of string.

Step Three: Cut the circle you've drawn out of the newspaper. [I also double checked my circle by folding the newspaper in quarters so I knew it was a true circle before I moved onto the fabric - it's much cheaper and easier to remake this portion rather than that fabric portion of the project.] I folded my fabric in half to keep the integrity of the fabric design and then seamed the center of it back together. You can pin the newspaper to the fabric to be sure you cut true to your template.

Step Four: Once you've cut the fabric out remove the pins. [If you are seaming together the two pieces be sure to keep them pinned together and sew this part now]


Step Five: I chose to finish the edges with binding tape to give a more finished appearance. It is time consuming and you have to pay close attention or you'll slip of the small seam and have to start over but it's entirely worth the extra effort.
Step Six: Using the cape in it's current form you'll want to measure the space where the collar will be - you'll need to cut a little larger than you measure so when you sew there's enough material. I also chose to use the binders tape on this portion as well. Leave an extra long piece of binding tape so you can tie your cape together.
Step Seven: Sew your collar to your cape!
I chose to dress up my sherlock outfit and wear a dress out with black boots. I purchased the cap at Party City and magnifying glass at Home Goods [Something fun I can put out all year]. I also chose to purchase a faux pipe at Party City and black gloves [not pictured]. Black tights and boots finish off the look!

Project Two:
Pumpkin Sculpting! A few years ago my brother came home from college after having met Ray Villafane. A famous pumpkin carver [whom I had no expectations to come close to being able to sculpt like but check out his work for inspiration and to see what hard work and practice can get you!]

Find some inspiration. I started with this but changed my mind after a little googling.

Peel the skin off the pumpkin - this for me is the hardest part. Pumpkin skin is tough and you'll want a fairly sharp tool. I bought a set of pumpkin tools at Target and found a good fit for myself in the kit. Most tools used are ceramic tools. Which you can find at Michaels [and use a coupon!] and get fairly cheap. My set was $10 and I used a 40% off to get it to $6 and some change.

The most important steps involve remembering the nose will be the highest point. So you'll want to avoid taking out too much pumpkin from these areas.

[I never carve alone! This year my two brothers and neighbor joined me! I'll show their results too!]

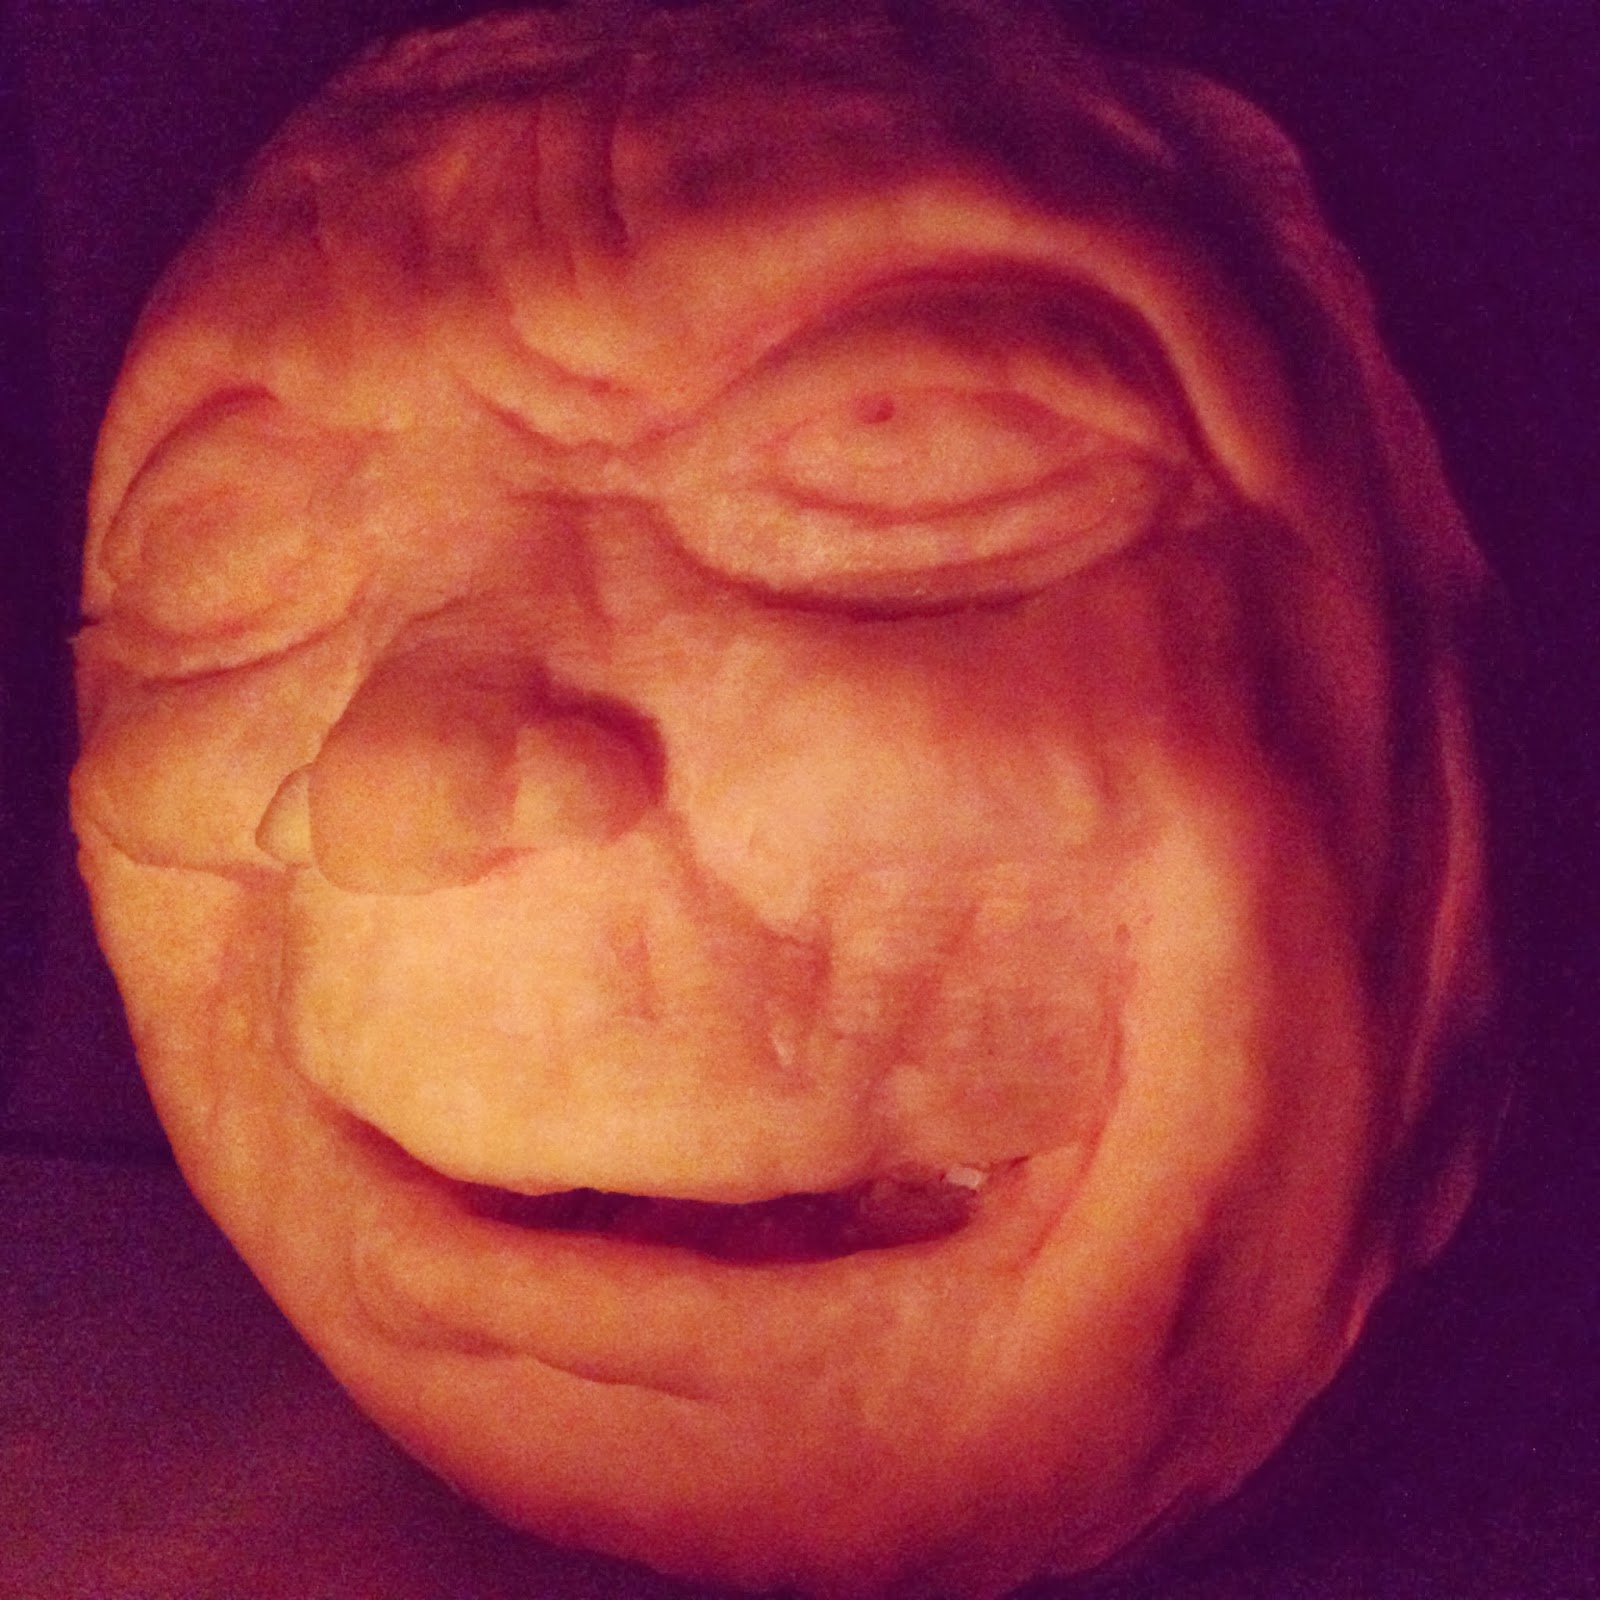
I wanted to give my pumpkin a humorous face so I chose to make him a bit lop sided and chubby.


I also wanted to have an open mouth - so I carved all the way through. You don't have to do this - in fact it speeds up the rotting process if you do!

It's important to keep the pumpkin wet - when it begins drying out it starts coming apart in larger chunks and can ruin all your handwork!


Another assistant! ;)

Here's my results!


And the boys!
Matt Byle:

Billy Byle:

Austin Simmons:

I'll post more projects when I get a bit more free time!
I started a new blog for anyone looking for help with color:
http://colordesigning.blogspot.com